NGI Piggyback Shield and ECU Cover for JB4, RaceChip or ProTuner
RIDICULOUSLY FAST SHIPPING! We ship the same day you order. Often within the hour!
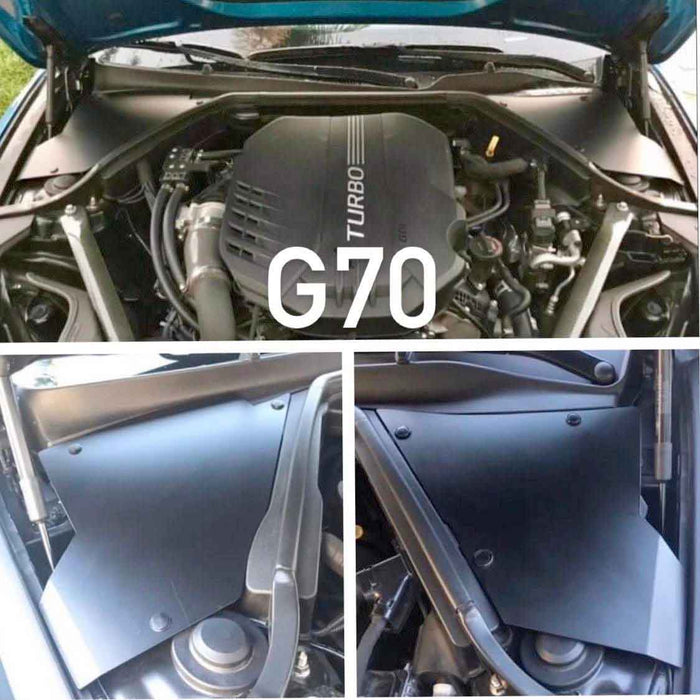
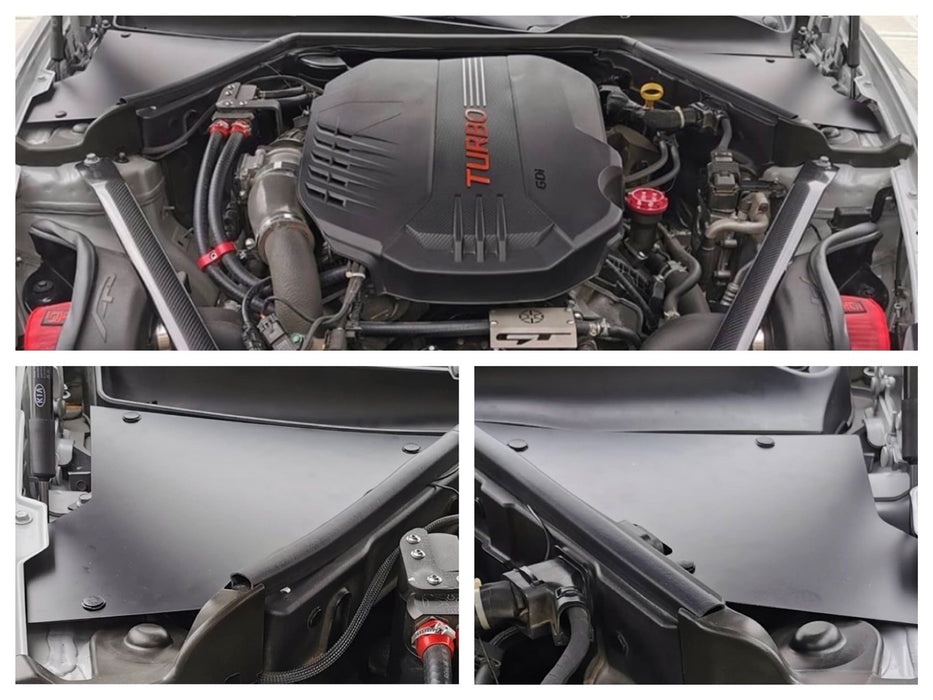
Protect your investment! Looking for a clean cover to shield your JB4, RaceChip, or Protuner? The NGI Piggyback Shield is the perfect solution. Manufactured out of aluminum, this vanity plate is the ideal solution to cleaning up the engine bay and protecting your tuner from all weather and car wash related elements.
- 100% MADE IN USA
- 5052 H-32 Aluminum
- Does not fit Right Hand Drive models
- (Driver side) installs using 3 factory clips
- Powder-coated satin black for a clean look!
- Made specifically to fit the Kia Stinger or Genesis G70
- (Passenger side) Piggyback: installs using supplied brackets and push pins for easy removal and factory look. Hides that ugly Blue washer fluid cap
NGI Piggyback Shield and ECU installation instructions:
Piggyback side(passenger side)
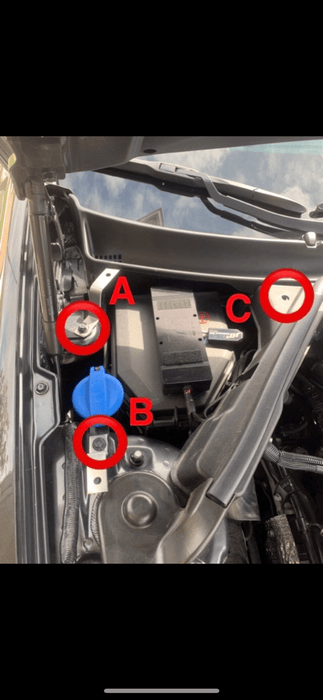
– Step 1: Remove bolt using 12mm socket shown in picture A
– Step 2: Remove bolt using 10mm socket shown in picture B
– Step 3: Remove factory push pin using panel clip remover tool shown in picture C. Make sure to save this for later install
Now for the install part. Start with larger bracket. Install on top of hood hinge and re-install the OEM bolt using a 12mm socket. Do not fully tighten until the very end. Now install the smaller bracket in front of washer fluid cap keeping it parallel with the channel. Using the OEM, bolt make sure the smaller hole is down where the bolt goes through. Lightly tighten the bolt using a 10mm socket leaving a little loose for adjustments. Now set the piggyback shield into place and adjust the brackets to where all the holes line up. Once aligned, remove the plate and tighten down both factory bolts. Set the cover shield back into place and install two new provided push pins and the factory pin removed from step 3. See pictures for details.
ECU Cover plate (Drivers Side)
– Step 1: Remove 3 factory push pin clips using removal tool. Do not discard clips. They will be used to install with the new cover shield
– Step 2: Remove OEM plastic ECU cover
– Step 3: Install new cover plate using the 3 factory push pins


